
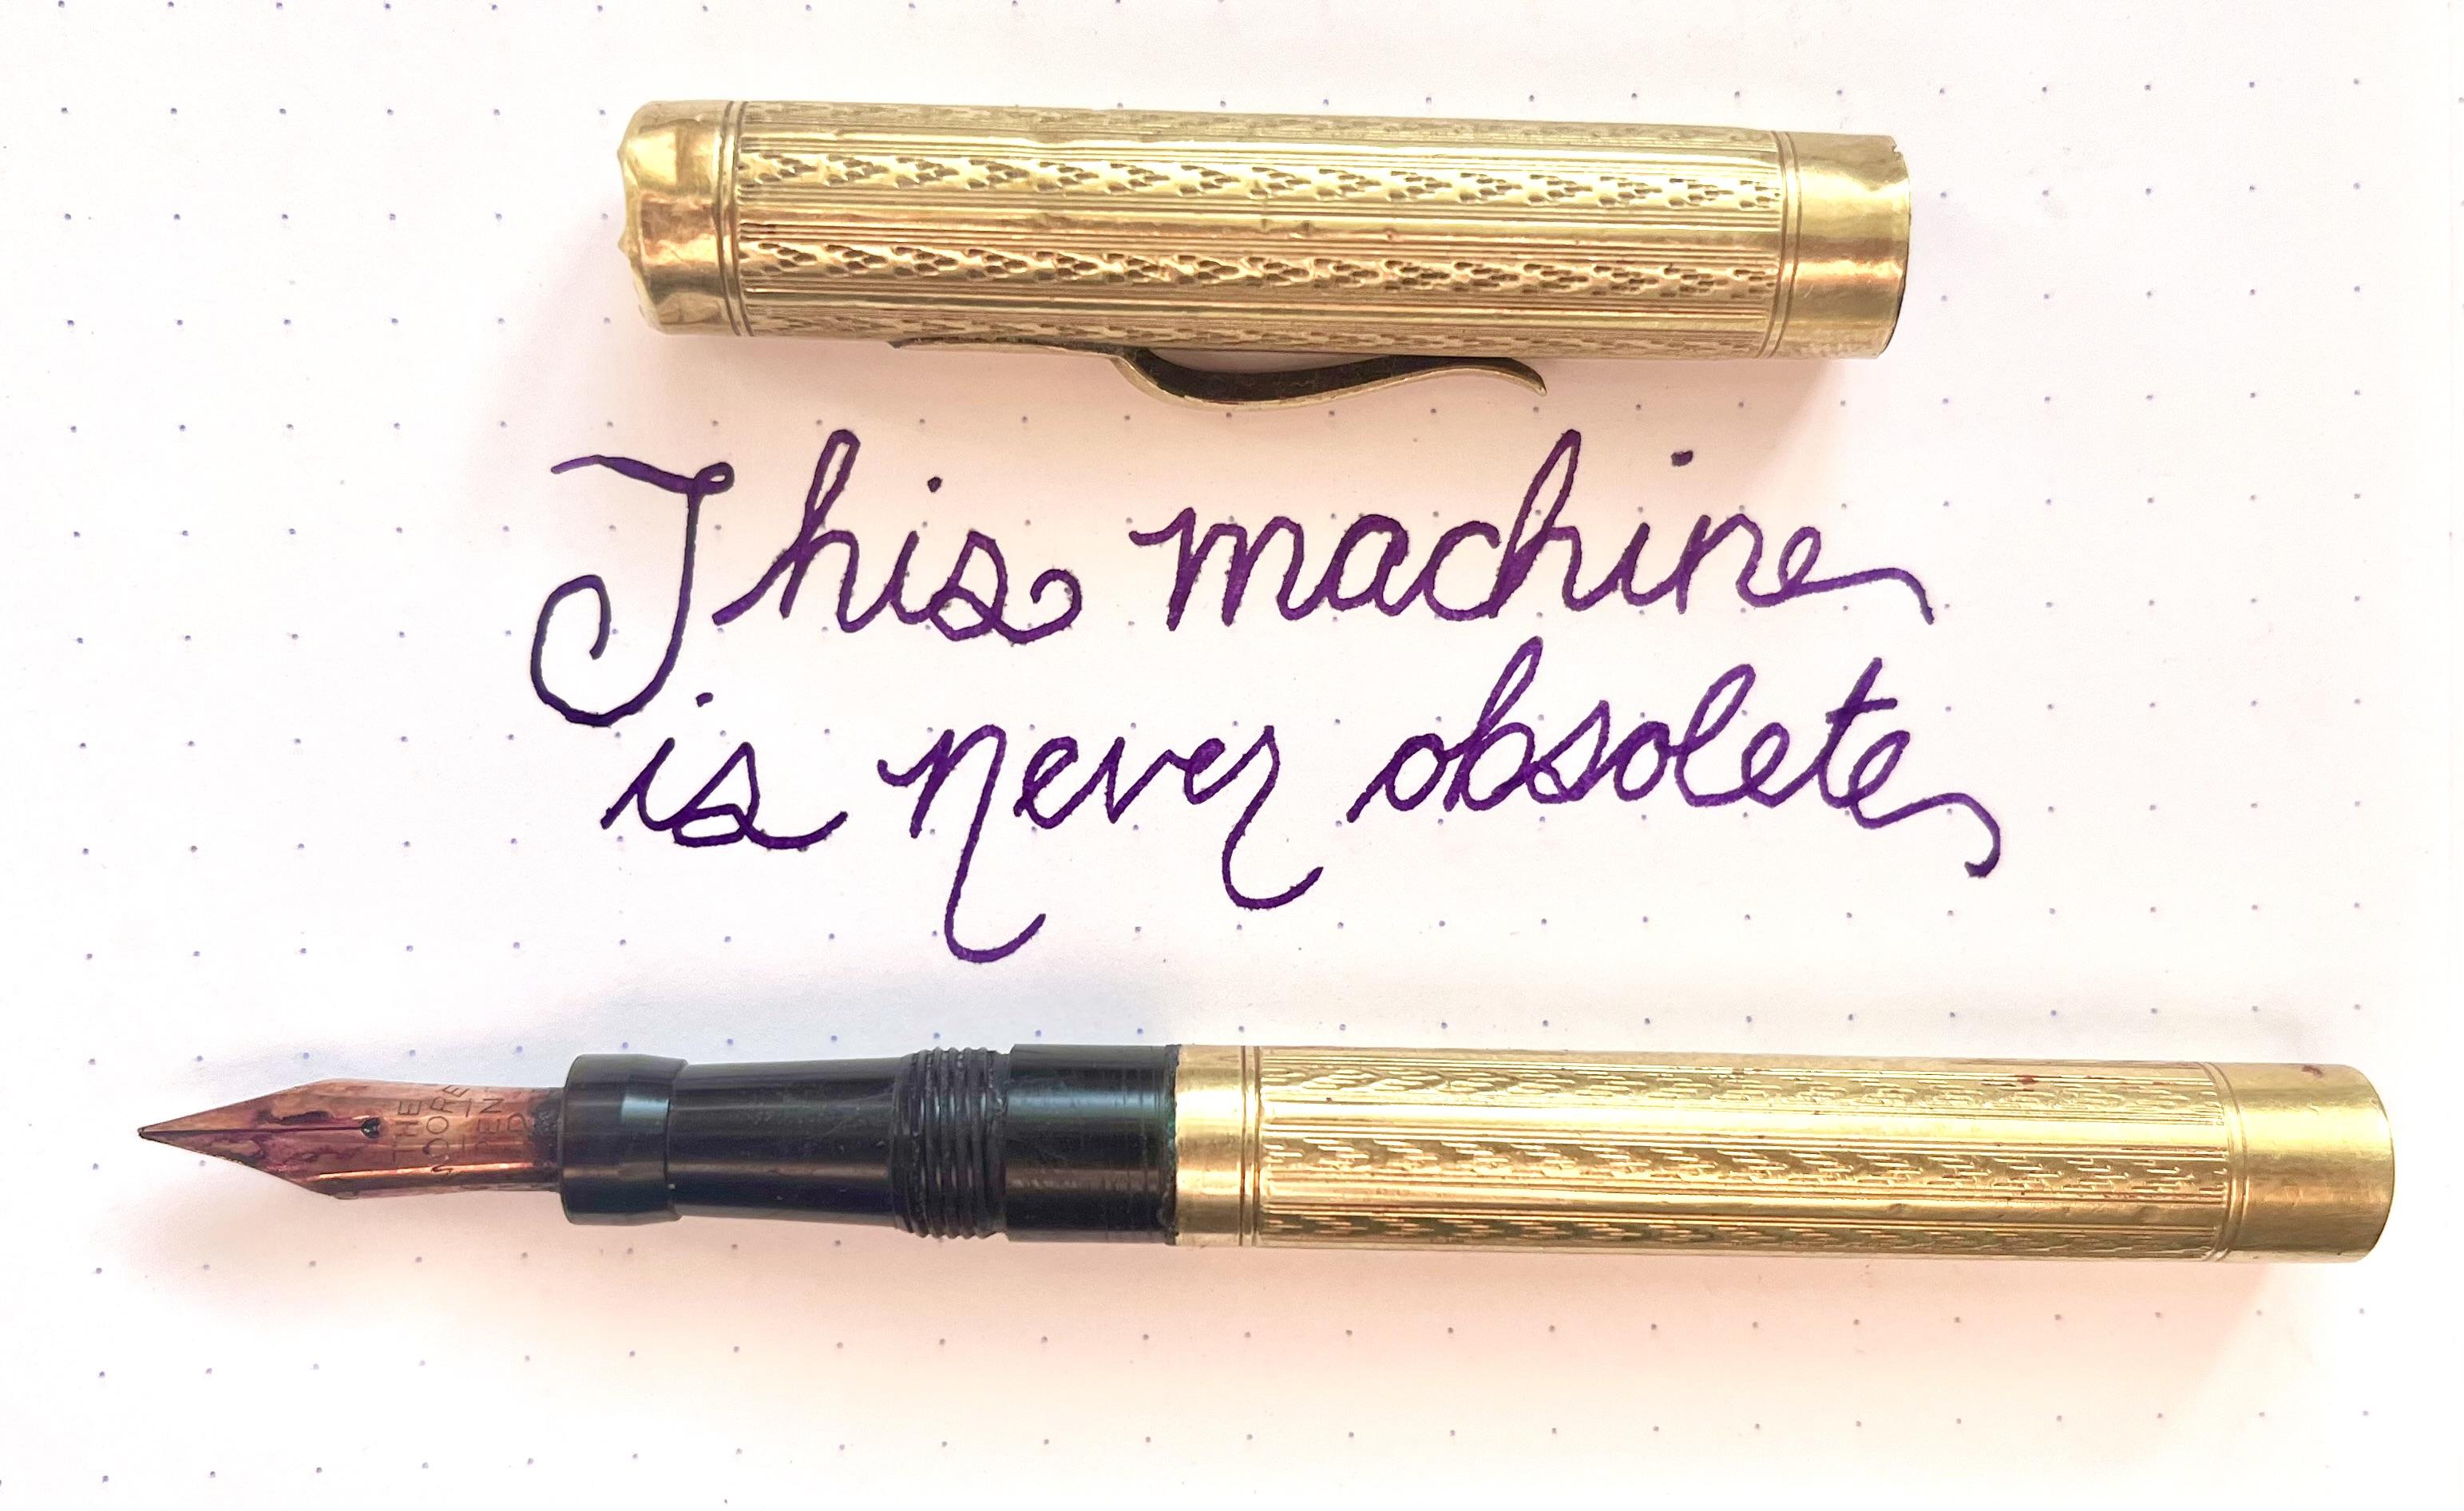
I was looking for a way to post my before picture as well, but couldn’t figure it out. The metal was dull and dirty, the rubber pen sac was cracked and hardened and, the pen was full of dried ink. I disassembled the pen, soaked it, polished the parts and fitted a new ink sac. I think it is a Whal Machine Turned pen from the 1920s.
When I write with it, the first few centimeters have no ink, then it flows. I gather this can be fixed, but I don’t want to press my luck with reshaping the nib and potentially breaking it.
I found a stash of old pens when cleaning out a relative’s house. So, maybe I’ll be able to share more of the ones I’m able to revive.
You must log in or # to comment.
Here is my advice with restoring fountain pen nibs, get a couple of cheap fountain pens. Chinese ones, or get some cheap Pilot fountain pens, whatever.
Make sure you also have a decent fountain pen so you know what it should feel like. Every single damn pilot fountain pen I have ever used, including tons of metropolitans and the like I have bought has written beautifully, you can also sometimes buy pilot metropolitans from normal office stores too.
Then get a loupe/magnifying glass like this…
Bonus points, by some spare nibs of a common interchangeable type, like #6 or #5.5.
Now practice bending the tines gently to align and fix issues on fountain pens that aren’t expensive or special to you, it is a cheap hobby to mess around with if you approach it like that.
For adjusting fountain pen tines I recommend using a thick book (think telephone number book) you don’t care about and a small mallet/hammer. Using the magnifying glass determine the way in which the tines need to be bent to fix them and then insert the tines somewhere low down in the pages of the book, then use the hammer to lightly but firmly tap the nib by striking the top of the book above the nib. If you want to broadly bend the tines with a very generalized push, stick the tines near the bottom of the book and thunk it, if you want a sharper bend to negate a sharp bend in the tines then insert the nib closer to the top of the book (thus less pages between hammer/mallet thwack and tines). This is an easy way to get a nice gradation of adjustment without needing any specialized tools except a magnifying glass.
Counterintuitively adjusting fountain pen nibs is usually a pretty forgiving process once you get the knack of it. You never need to do something crazy and decisive to the nib, it is a process of slowly adjusting and checking and you can almost always reverse a change you make within reason.
As you get more used to adjusting the nib you can also very carefully slip a thing sheet of mylar type plastic between the tines and adjust the tension with which the tines are pushed together at the end, this can be done with the pen inked up and all you do is gently press the tines apart on one side and then the other and then test by writing, if the tines are too spread out for good ink flow the reverse can be done by inserting the nib sideways and using the book and mallet method, a light tap with just the nib tip inserted vertically will tend to make the tine tips push together more.
The Jinhao x750 takes the #6 nib and has a nice solid body. Most if not all of the pens I have tried came out of the box writing well and the converter included is nice. The cap doesn’t seem to seal well longterm so they don’t stay inked up forever but they are a good option for a reference pen you can swap out with a different nib down the road.
There are MUCH cheaper places you can get a Jinhao x750 on ebay and the like, I am just linking Goulet because they are a nice fountain pen seller with good info.
note The final nib adjustment check is to do figure 8s with the fountain pen inked up and see how it feels. Everything comes down to the little ball at the end of the nib that is split in half into two tines, by doing figure 8’s you are testing that the tines are closely aligned enough (dynamically too because the nib is being pressed to a small degree) that they approximate a ball and a sharp edge doesn’t catch the paper from certain angles.
Thanks for the information. I’m just starting on this journey and have a lot to learn.
That looks great! That takes a lot of patience to pull off.
I’d reckon the hard starts may have something to do with the cap and/or ink. I’ve heard it’s better to use period friendly ink with vintage pens. Modern Japanese inks are particularly ill suited to them due to basic pH levels.
Is the hard start with every letter or word? Or just each cap/uncap? If you fill the cap with some water do you see any dripping through the clip or elsewhere? If so the ink will dry up in the nib between uses and cause that hard start. Or it could simply be a threading issue. A lot of modern metal pens have an o-ring to help seal the pen when capped.
It’s only on the very first stroke. I’ll see how annoying it becomes as I keep going.
@DadFather @penfount I have a very similar pen! It is a Moore (based in Boston MA) and the estimated date is also the 1920s. It is an eyedropper (no rubber sac) and there is no hole in the cap.
When I bought it, the nib was too sharp and tore up paper. I buffed it out on the bottom of a coffee mug and it works great (though it’s a bit of a gusher). I put a daub of silicon grease on the threads and the ink inside is currently three or four years old and still wet.
#fountainpen #antique #antiques
@0xabad1dea @DadFather @penfount Oh man, you are really making me want to get my dad’s pens out. He was a chemistry student in the 60s and swore that an ink pen is the best way to write chemical formulas and diagrams.
Go for it. I’m finding that the ones with a lever on the side are the simplest, mechanically. I found info and supplies at https://vintagepensacsandparts.com/ and Grandmia Pens on YouTube shows the innards of lots of models.
@DadFather Thanks!
nice work!
Great job; it looks beautiful!

